The Legend of Zelda is one of my favourite games – the first four entries are on the top. Each one has its own place in my heart, it’s own meaning and associated memories. They’re games I can play to this day and still get excited about every door, every key, every treasure, and every beast. These games are the spirit of adventure and discovery and exploration. My opinion of the Zelda series has had its highs and lows, but these are titles I can always come back to and have a good time. There isn’t much in the line of other media I get this excited talking about.

Many of the Zelda games have been malleable, you aren’t required to just take them as they expect you to take them. You could often prepare beyond the curve, or even purposely keep yourself behind the curve. Sometimes you could do things out of the given order with an understanding of mechanics and item properties. Often you were rewarded for straying from the path and just exploring. This format lends itself quite nicely to challenges.
And the classic challenge for The Legend of Zelda is the Swordless Quest.
THE CHALLENGE
Now, a Swordless challenge works just as it sounds – do not pick up ANY sword in this game and get as far as you can without it. Of course, you cannot beat Ganon without a sword so the goal is to slay the Patra in the room just before Ganon.
-I attacked this Challenge from both the First and Second Quest. The greater challenges and mixed up item order of the second quest would require different considerations and planning.
-I am also running a 000 or no deaths game. It’s not a huge task with a sword, but it could get hairy without one. So if I were to die, I would be required to start the file over.
-I did allow myself to bail out, however. There are points where your only offense might be a Blue Candle and Bombs. So if I can’t fight back, I bail out with the save menu.
-I made the Red Ring and Silver Arrows a requirement for victory. Now I don’t know if this is usually required of these runs, but simply reaching and slaying the final Patra would have made Level-9 far too short.
THE FIRST QUEST

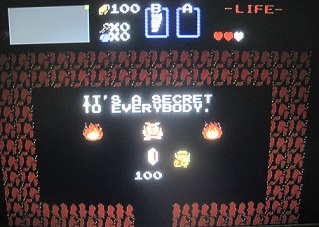
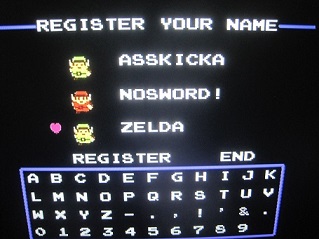
We start the First Quest with the aptly named NOSWORD!,
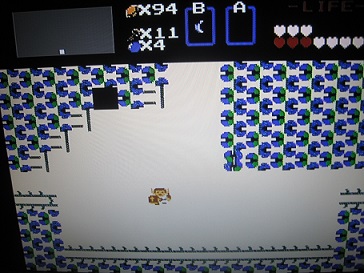
The first thing we needed to do is get some offense. The cheapest reusable offense available is the Blue Candle. Luckily the First Quest’s Overworld is relatively accessible in terms of Rupees. There are plenty of “Secret Moblins,” even a few 100 Rupee Moblins.
-I started then by acquiring the Blue Candle. Then some Bombs and the Arrow. I found the Letter, then grabbed as man Heart Containers as I could.
-Level-1 was simple. Most rooms with enemies I could just enter and leave to renew my Candle. Once I had the Bow, it became a simple matter as I had already bought the Arrow and I had a sufficient remainder of Rupees to use it. The Boomerang would come in handy too. Aquamentus fell in three arrows.
-I once again ferreted out some Rupees at this point and bought a Blue Ring. I gained a few more rupees at this juncture to keep my Bow in use. At this point I was recharging my Bombs by stunning Blue Moblins against some trees so they couldn’t escape from the Blue Candle’s flame.
-Level-2 was straightforward enough. I started to avoid locked doors as much as possible to stockpile keys. You can get the Magic Boomerang early enough here, and the boss is a lone Dodongo.
-Level-3 feels big if you aren’t familiar with it. But a lot of paths in these dungeons lead to maps or old men, so they aren’t on the schedule for this challenge. The Darknuts are introduced here, but Oranges only require one so it wasn’t too bad. Grabbed the Raft and slew Manhandla with a single Bomb. Like a boss, ha ha.
-Level-4 was a Dungeon I half completed. Gleeok aren’t weak to Arrows or Bombs, and as such I would need the Magic Wand to slay the Dragon. So I snagged the Ladder and got the heck out.
-Level-5, First Quest was the toughest part of the challenge for me. Darknuts can sometimes deflect your bombs and this place has Blues – they require two blasts to kill. And if I wanted the Bomb Upgrade AND the Recorder you have to clear two rooms of them. Once I understood that the deflection was related to Link’s position I managed to take them out but it was hairy for a while, and I had to retry a few times as I ran out of Bombs. But once that was done, it was done. Come on now, Digdogger is the boss. Pfftthhh!
-Level-7. I skipped ahead to this Dungeon because it holds the second Bomb Upgrade. The Dungeon is big but also pretty easy. I could use my Bow for the most part – it’s crawling with Goriya. So I grabbed the Upgrade and the Red Candle, and finished it. The boss is Aquamentus and there’s a required fight with a Digdogger, What a Savage Labyrinth! Heh.
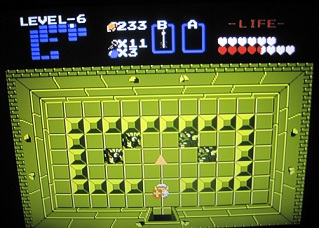
-Now for the dreaded Level-6. With a Magical Shield to protect against Wizzrobes, I entered the place. Wizzrobes aren’t bad, honestly – I think people just get tripped up by the movements of the Blues. But despite ONLY being weak to Bombs on Swordless an Blues requiring THREE BOMBS to kill they aren’t bad. See, they can’t deflect the blasts and they are much easier to group together than Darknuts. So I claimed the almighty Wand, vanquished the Gohma with my Bow, and collected the Triforce piece.
-At this point I return to Level-4 and slay Gleeok with the Wand and finish the Dungeon. The Wand is just like a White Sword in power, and the Wand itself damages on contact as well as launching the magic waves. Most importantly the contact damage harms Darknuts, Gleeok, and Patra.
-Now, I take on Level-8. With the Wand, it’s not so bad. I grab the Magic Key but I leave the Book behind. The reason being is that if I’m using the Wand for melee damage, the fires the Book casts would only hinder me. The four-headed Gleeok was probably the toughest boss in this challenge, but I got it.
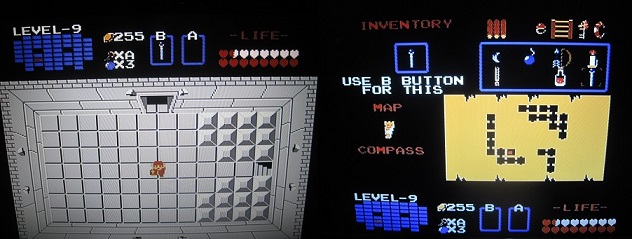
-Level-9 wasn’t so bad but it took me three passes at this dungeon to complete it to my liking. I grabbed the Red Ring on the first pass, the Silver Arrows on the second pass, and reached the room before Ganon on the final pass. Now, this is solely because I was running out of Bombs. Level-9 is very large but the items and paths I wanted had rooms which required me to kill groups of Wizzrobes. They are unharmed by the Wand, so I still had to use Bombs on them. It just made sense to refill after each acquisition. The Patras were simple enough. I find the Wand a little laggier or less accurate than the Sword, but you just need to stay outside of their circle of little Patras.
So I reached the end! But the journey was just beginning…
THE SECOND QUEST
The Second Quest of Zelda really mixes things up. Dungeons are in different places, the item order has changed, the secrets on the Overworld have changed, some enemies have new qualities and there are new mixes of enemies to complicate things too.
However, I did some deep planning for this one. I decided to get the Wand before I ever set foot in Level-1. Now, to do this I’d need the Recorder from Level-2 to open Level-6. I’d need the Ladder from Level-6 to reach Level-8. And I’d gain the Wand in Level 8. Simple, yeah?
I decided to play it risky and not do too much grinding here. I bought an extra Key, a Magical Shield to protect against the Wizzrobes in 6, a Blue Candle for at least a little offense, some Bombs, and I only picked up the Heart Container near Level-6.
-Level-2 went smooth, I used the Candle to push some Gibdos out the way. I did take some damage trying to get around Manhandla, but I managed to reach the Recorder. Made sure to get a second Key here, as well.
-Level-6 is death without a Magical Shield. The second room starts with a Blue Wizzrobe coming down the central column. So I lit the place up with the Candle, deflected their shots, and escaped. That was the worst of it, I made a run for the Ladder room (the path to which required one of those Keys).
-Level-8 at last! Big stage, but the Wand is not far if you know your way around. Took a hit trying to get through the wall in the Goriya room, but after that you just open the locked door in the Dodongo room. Now, I Bombed the Wallmasters in this final room, and when they were gone I opened the way to the Wand.

-NOW I decided to go back to Level-1, and I will be doing these dungeons in sequence this time. Grabbed the Boomerang and smoked this Dungeon. Maybe the Wand is a little overwhelming for this point in the game, ha ha.
-At this point I returned to grinding. Got as many of the Hearts as I could and the Blue Ring et al.
-Level-2 was a pretty straight run since I already had the Recorder. Since I had the Wand I could take out the Gleeok here, as well.
-Level 3 is really easy, even by normal standards. You need some Meat for this (Second Quest gets expensive) but that’s only if you wanted the Magic Boomerang (I did). The actual solution to the Level is really short, however. The boss is three Dodongos, nothing too difficult there. They aren’t near the Triforce though, that’s a room of Goriya. Well okay, that one’s done.

-Level-4 is really big, but it’s doable. Now, we need 150 Rupees to complete this level. We need to leave 50 with an Old Man, and 100 for the Bomb Upgrade (and we want that). Reaching the boss Digdogger is one thing, the Treasure is along a secret path accessed from the Triforce room. The Treasure room has Darknuts and Pol’s Voice. This is one of the dicier rooms in the Second Quest challenge. We NEED the Raft to get the Bow, and the Bow can kill Pol’s Voice in a single hit (or I could have screamed were I playing my FDS copy). The Magic Wand defeats them in five hits, but it must contact them. Blue Darknuts require four hits with the Wand. And there are blocks all over the place. So you don’t have much wiggle room. If you have any Bombs left, I’d suggest softening up the Darknuts first. Not a bad room if you are prepared for it, otherwise it’s easy to get backed into a corner.

-Level-5 is a Wizzrobe level this time around. Only a few of them were required though, mostly along the way of the Bow. So the Bow was acquired, Gohma was slain, then Manhandla, then Gleeok, and then the Triforce was mine.
-Level-6 time. We already have the Ladder so it’s basically a straight run up to the stairs in the Blue Bubble room. I don’t think any of the Wizzrobes are required battling? Anyhow, made my way to the final Gohma then finished this dungeon.
-Level-7 is pretty twisty. There are two Old Men to pay in this Dungeon, but if you know the layout you only have to pay one. So I snagged the Red Candle, even though it’s useless to me now, and fought through the Dungeon. There are a couple of bosses scattered around but the toughest rooms are filled with Blue Darknuts and shooting statues or even Bubbles to bounce you around. Patience was key here.
-Level-8 holds the Magical Key and Wand, and I already had the Wand. It’s a long Dungeon with many stairs, and unfortunately the Meat is required to reach the Magical Key. Once I had said Key, I found the second Bomb Upgrade and then finished the stage. All eight Triforce pieces!
-I wouldn’t say Level-9 of the Second Quest is easier than its First Quest equivalent. It’s a more confusing layout to be sure, but I never had to leave the dungeon to recharge my Bombs. The encounters are similar to the First Quest and you still find a whole bunch of Wizzrobes. But the big difference here is that there aren’t nearly as many required Wizzrobes. The big thing with Level-9 is the amount of crossroads and one-way doors and one-way staircases staircases. Once you know the way you can make it through quickly. Coincidentally you have to pass the final room to reach the path to the Silver Arrows – which I made a personal requirement. So I had to trek through most of the Dungeon twice – since backtracking isn’t very smooth in this Level.

Reaching the end room in each play through means that the challenge is complete!
MISSION COMPLETE!

I’ve run a few Zelda challenges in the past, and they make you think about the games in entirely different lights. I mentioned when I wrote about my Final Fantasy challenge that a lot of people see challenge runs as artificial difficulty. And it’s true – you are going outside of the intentions of the game. But it’s also very natural to apply a challenge to a Zelda game. Like I said at the top, they’re often quite malleable.
And as for myself, I’ve been playing these for as long as I can remember. And they’re always a fresh play, I’m always grinning like a dope when I play them. So I want to play them in new and exciting ways, it’s icing on an already scrumptious cake.
I expected this challenge to be quite difficult. It had its tighter moments but it’s entirely doable and I recommend it for anyone who has beaten the game before. That speaks volumes about The Legend of Zelda, you know? It’s the kind of game that is quick to pick up, and you master it by playing it. Knowing the properties of enemies, the locations of items, the required paths through dungeons, how close you can get to something without taking damage. These are all things that you pick up simply by playing, we make subconscious adjustments. And when you are taken out of your element, this game is flexible enough that you can adapt in kind. This kind of challenge reinvigorates the fan and forces one to approach familiar ground in an entirely new way.
Congrats on conquering this challenge! Is there anything else left that could make another playthrough even harder?
lol… maybe this will make you 🙁 but I only ever went through LoZ once. No second quest. These “artificial challenge” runs are not something I’ll ever attempt, but you seem to enjoy the difference they make playing the game and that’s a good thing.
Nah man, I’m sure most people don’t touch second quest, and I certainly wouldn’t say it’s a requirement for beating the game.
There are certain things that I could do to make this is a harder challenge. For one – never get the Blue Ring or Red Ring, so you sustain full damage. Also – get only the hearts you are required to get, maybe pay your heart containers instead of money to pass old men in second quest.